


AirMagnet products use the Windows WLAN AutoConfig to make active associations within the application. While the AirMagnet product is able to create profiles for Preferred adapters within the application itself, the following steps will be done with AirMagnet Survey or WiFi Analyzer closed.
For every supported wireless adapter you intend to use for an active or active iPerf survey, you will need to configure a wireless profile.
Creating one profile for a given adapter does not create the same profile for another adapter; if you plan to connect to the same SSID on different adapters, you must create a profile for each adapter.
Also, if an adapter is plugged into a new USB port, you will need to re-create the profile for that new connection.
Create the Profile
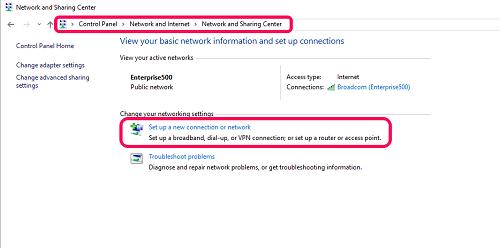
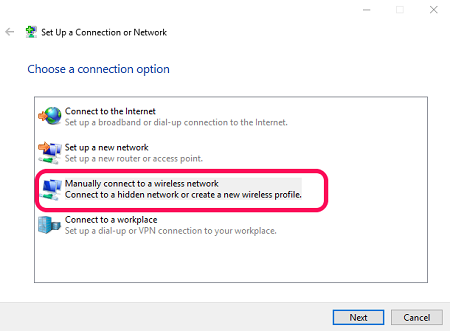
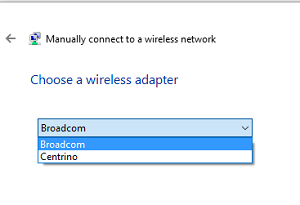
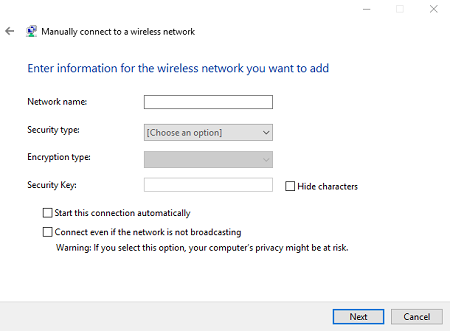
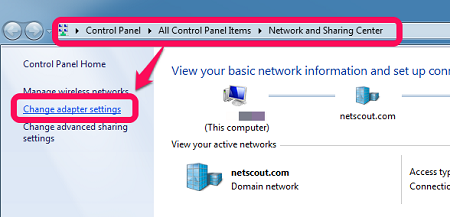
Note: the Broadcom adapter (the 3x3 AM/C 1097 802.11ac adapter) and the Intel Centrino adapter are both listed. Whichever profile you create is tied to the adapter. Here, if we choose the Broadcom to connect to a specific SSID, then we must use the Broadcom within the AirMagnet product to connect to that SSID.
Test the Connection:
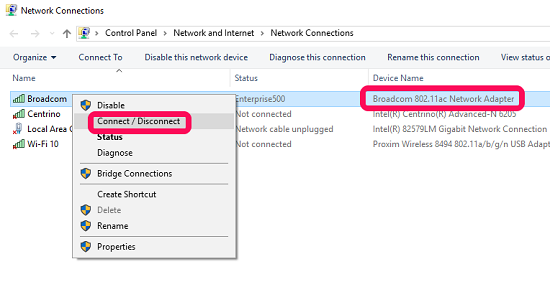
A pop-up will open; select the profile you just created
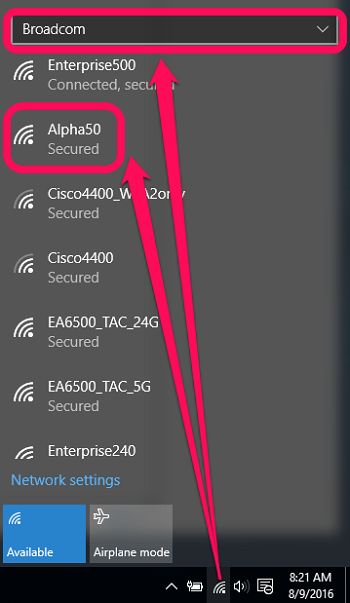
If the connection works, you are now ready to use it with your AirMagnet product.
If the connection does not work, you will need to troubleshoot it. Until the connection can be made within Windows, it cannot be made within AirMagnet products.
Wireless Network Connections and your Adapters:
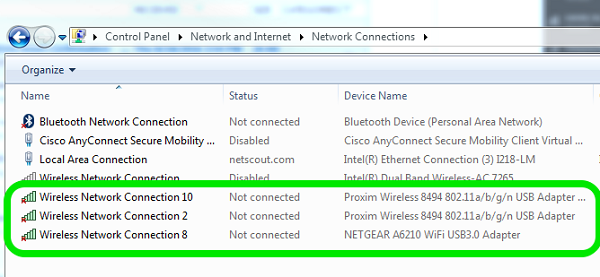
When a USB adapter is inserted into a USB on your device, Windows creates a Wireless Network Connection for it. When selecting the profile for your SSID or AP configured correctly for the correct adapter and Wireless Network Connection. Switching USB ports can change the connections. To know which adapter is associated with which Connection, you can either;
1. Use the Command Prompt:
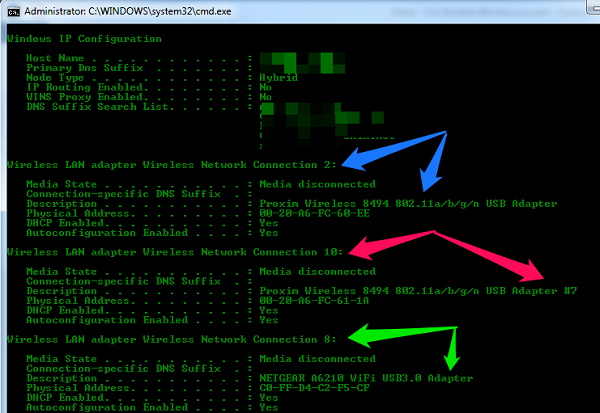
2. Use the Network and Sharing Center GUI
Here we see the same information as we did at the command prompt:
Command Line Tips:
Windows 8 and 10 have removed the ‘Manage Wireless Profiles’ applet. If you need to see the stored profiles on these versions of Windows, you will need the following commands at an elevated Command Prompt. Start > Search for cmd; when the command prompt appears, right-click and select Run as Administrator.
To see stored wireless profiles, type:
netsh wlan show profiles
This will show a list of saved profiles of your connected WLAN devices. Then you'll need to write/save/memorize the profile name that you want to change.
To see the stored key (WPA/WEP/etc) of a specific profile:
netsh wlan show profiles name=[profile name] key=clear
You'll find the key content under security settings.
To delete a stored profile:
netsh wlan delete profile name=[profile name]
This will delete the stored profile of every WLAN interface. If you want to delete the profile of a specific WLAN interface, you need to use the following:
netsh wlan delete profile name=[profile name] interface=[interface name]